DIY Trailer Electrical System Upgrade
DIY Trailer Electrical System Upgrade


Upgrading your trailer's electrical system is one of the most rewarding DIY projects for campers, overlanders, and utility trailer owners. A reliable setup ensures your lights work flawlessly, brakes engage safely, and you can power accessories like interior lights, fridges, or even inverters off-grid. Whether you're fixing faulty wiring or going full off-grid with solar, this guide covers the essentials.
Why Upgrade Your Trailer's Electrical System?
- Safety: Proper brake lights, turn signals, and electric brakes prevent accidents.
- Convenience: Add interior lighting, USB chargers, or appliance power.
- Off-Grid Capability: Integrate batteries, solar, and inverters for boondocking.
- Reliability: Switch to LED lights for brighter, longer-lasting performance with less power draw.
Basic Wiring: Understanding Connectors and Diagrams

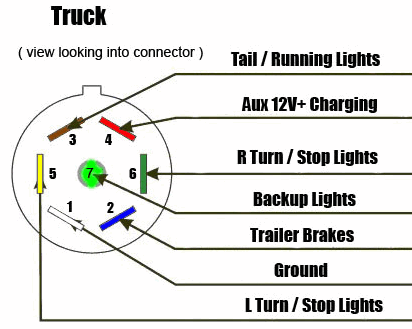
Most trailers use a 4-pin flat (basic lights) or 7-way round/blade connector (includes brakes and auxiliary power). Familiarize yourself with the pinout:
- White: Ground
- Brown: Tail/running lights
- Yellow: Left turn/brake
- Green: Right turn/brake
- Blue: Electric brakes (7-way)
- Black: Battery charge/aux power
- Red/Purple: Backup lights or other
Always use a wiring diagram specific to your trailer and tow vehicle.
Step 1: Upgrade to LED Lights

LEDs are brighter, draw less power, and last longer. Replace incandescent bulbs or full fixtures. Ensure polarity is correct—LEDs won't work if wired backward.
Step 2: Install Electric Brakes and Controller
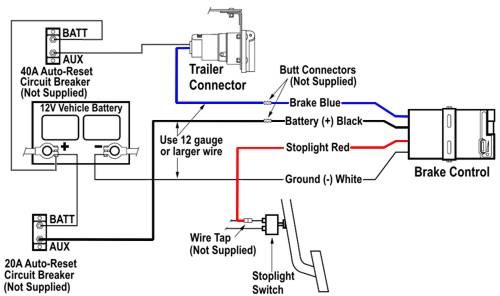

For heavier trailers, add a brake controller in your tow vehicle and wire the blue line to the trailer brakes. Test thoroughly before hitting the road.
Step 3: Add a Battery and Charging System

Install a deep-cycle battery in a secure box. Use the 7-way's black wire for charging while towing, or add a dedicated charger.
Step 4: Go Off-Grid with Solar and Inverter
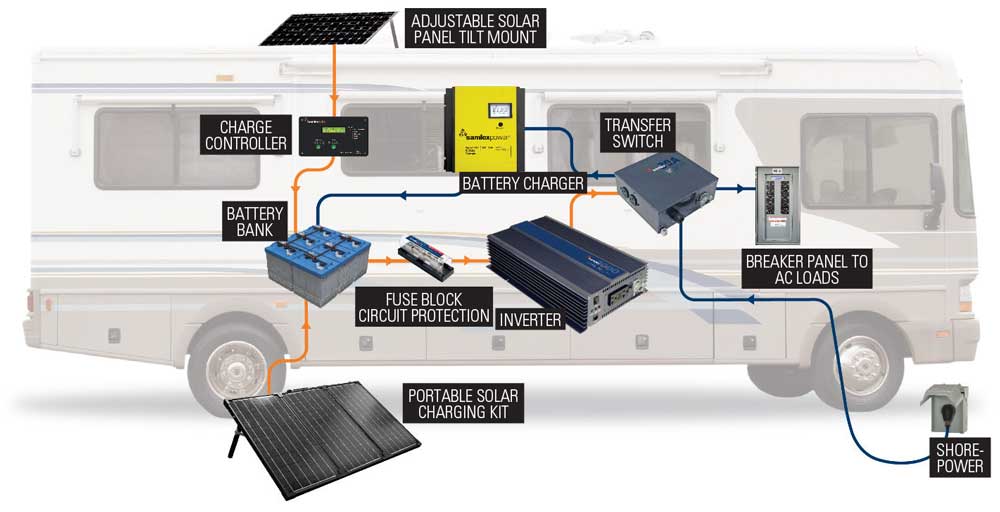
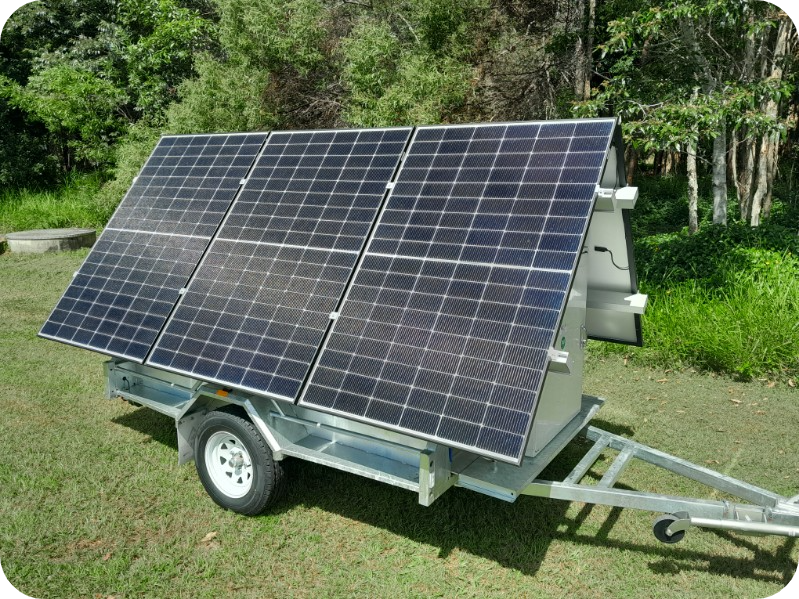
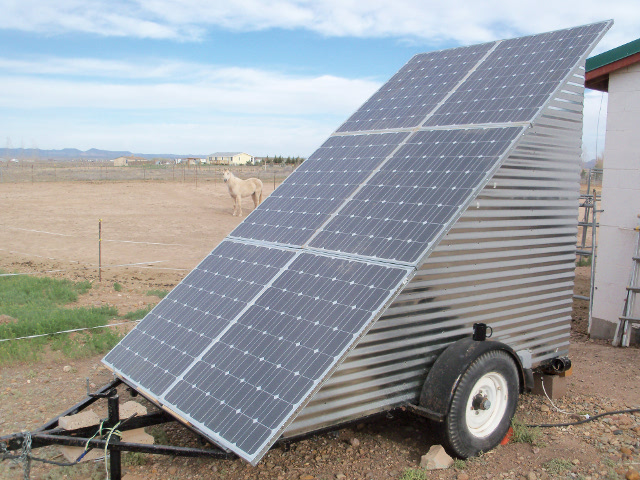
Mount solar panels on the roof, connect to a charge controller, then to your battery. Add an inverter for 120V AC power. Start small (100-200W) and expand as needed.
Tips for Success
- Use marine-grade wire and heat-shrink connectors for weatherproofing.
- Add fuses or circuit breakers for protection.
- Test everything with a multimeter and trailer tester.
- Ground properly—poor grounds cause 90% of electrical issues.
With these upgrades, your trailer will be safer, more functional, and ready for any adventure. Happy wrenching!


评论
发表评论